Information
How To Vent Bass Swim Bladder
Just because you let your catch go, doesn’t mean it actually lived. Learn how to increase the survival rate of your bass releases through fizzing and venting so that we all can enjoy fishing for years to come!
Guide To Venting A Fish Swim Bladder
If you’ve been fishing for a while, you’ve probably heard about venting or fizzing a fish after it’s been caught, but you may not know why this is important, when you should be doing it or how to do it.
In this article we’re going to walk you through bass fizzing to help increase the survival rate of your bass catch and releases.
What Is A Swim Bladder?
The swim bladder is a gas-filled organ that helps the fish maintain buoyancy and balance.
The swim bladder consists of two chambers: the larger anterial and the smaller post-anterial. Water flows in and out of these chambers via a connection to the mouth.
The post-anterial chamber is where the largest amount of gas is stored and provides most of the buoyancy.
If the swim bladder is punctured, water will slowly begin to enter into the gas chamber. This will cause the bass to eventually sink when the gas chamber is completely full. In order to release the gas, the fish must be kept in a similar position to where it was caught for a period of time to allow the excess air to be released. If the fish is turned upside down or jostled around, it won’t have a chance to expel gas, and it will need to be released, which is a bad outcome for the fish.
When Should You Be Fizzing Bass?
Fizzing or venting isn’t necessary every time you pull in a bass especially when you’re fishing in shallow water.
However, once you start fishing in deep water that is 20 feet or deeper, you’ll likely need to vent the swim bladder before releasing the bass back in the wild. Otherwise, the bass will most likely die.
When a fish is hooked and quickly pulled up from deeper waters, the pressure around its body decreases and the gases trapped within the swim bladder begin to expand.
This expansion, also known as barotrauma, is similar to what a scuba diver can experience if ascending out of the water too quickly.
When the swim bladder expands, it puts pressure on various parts of the body and prevents the fish from being able to properly swim.
Warning Signs Of Barotrauma In A Fish
As a precaution, you should be venting any bass that you reel up from water depths of 20 feet or more. However, there are some other warning signs you should be looking for:
- Blood in the fishes mouth
- Bulge sticking out of the side of the fish right behind the pectoral fin
- Bulging eyes
- Bloated belly
- Stomach protruding out of the mouth
If you see any of these warning signs, you should vent the fish to increase its chances of survival.
Where Is The Bass's Swim Bladder Located At?
You can probably guess that the swim bladder is located just under the skin of the fish, but where exactly can vary.
Based on the area of the country you’re fishing in, the swim bladder can be located just behind the dorsal fin, just under the dorsal fin or even along the lateral line.
When venting, you’ll need to make sure you’re hitting the bladder. If you go too far, you risk puncturing vital organs, which can lead to infection and death.
Bass Venting Technique
It’s important to be cautious when venting a fish. Not only could you permanently damage the fish you’re trying to save, but fish are slippery and wiggle a lot, so you’ll want to make sure you don’t accidentally poke yourself
Step 1: Prepare Your Tool
You’re going to need to use something to puncture the swim bladder.
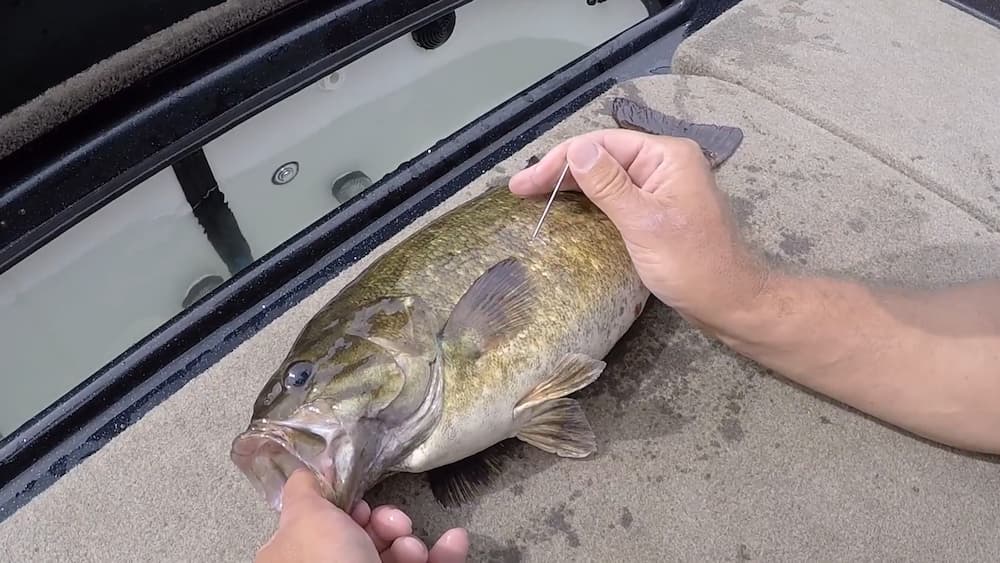
The safest thing you can use is a long, thin object, like a needle, to puncture the swim bladder. If you use something sharp, you run the risk of cutting the fish open, so keep it long and thin so you only make a very small hole.
If you happen to be out on the water and don’t have something like a needle, you can also use the tip of the blade on your fishing knife or a quick little poke with your hook.
It’s important to keep the hole as small as possible to prevent water from leaking into the bass’s body once its released.
Step 2: Find The Fish's Swim Bladder
The swim bladder is found under the skin of the fish, but you’ll need to determine exactly where it is located before you need to vent the bass.
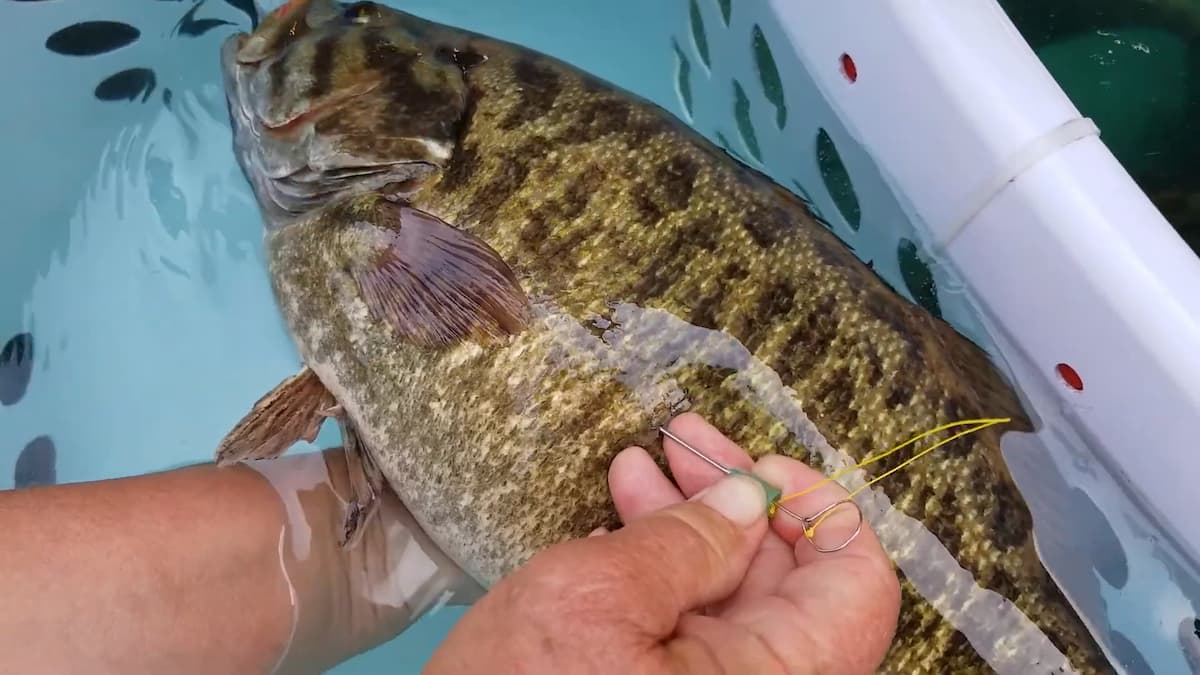
This is typically behind the dorsal fin along the lateral line of the fish. Once located, count about 5 to 6 scales back and that should be the approximate location of the swim bladder.
Step 3: Puncture The Swim Bladder
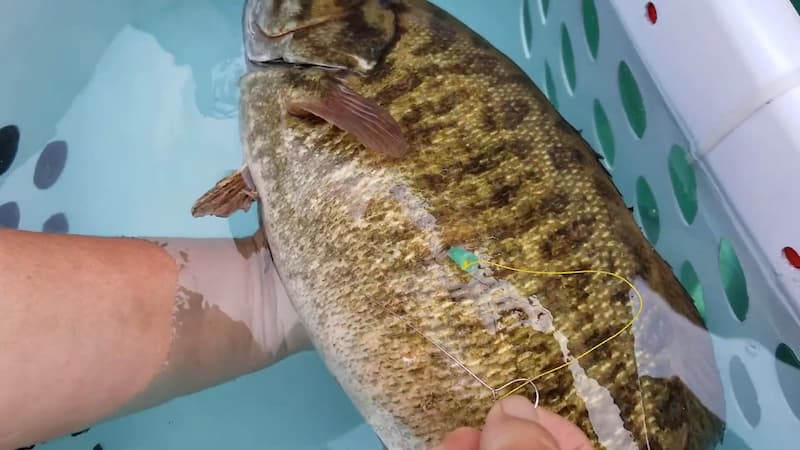
Puncture the swim bladder with your tool.
You will want to slowly insert the needle into the location at any angle to go underneath the scale. Continue to insert until you’ve reached the swim bladder.
Step 4: Allow The Air To Release
Slowly let the air out of the swim bladder through the puncture you just made.
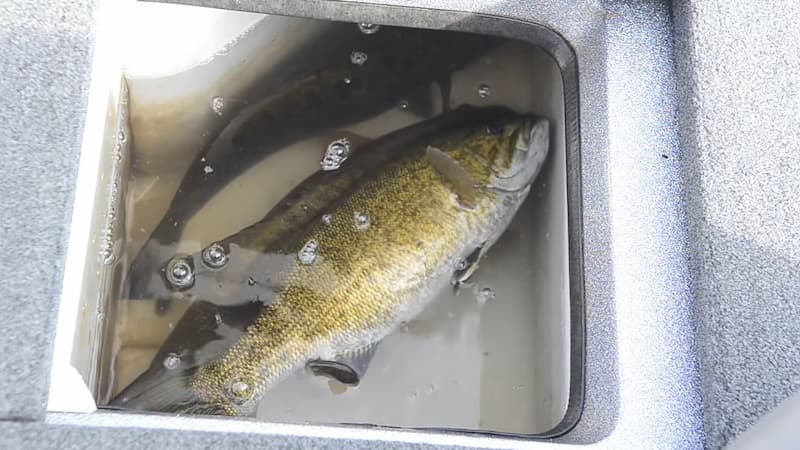
Some people recommend placing the bass into your live well at this point so that you can visually see the air release from the fish’s body.
Step 5: Vented? Then Release The Fish
If you can’t feel any more air escaping from the puncture, carefully hold the fish up-right and allow the bass to swim away on its own.
Tips For Increasing Bass Survival
As you’re venting the bass, there are several things you can do to increase the bass’s survival.
- Before venting, place the bass in your live well and allow the fish to calm down first. Once de-stressed, proceed with the venting process.
- After venting, place back into your live well. If the bass is holding itself in the correct body position then you’re good to release it. If it’s floating to the side then it still has air trapped in its bladder.
- Wear nonslip fish gloves during the venting process.
- If you don’t want to purchase a fish venting tool, you can just use a hypodermic needle. Just be careful and don’t stab yourself.
Summary
Venting a bass is a great way to improve their survival rate and make sure they make it back to the wild.
Bass venting may not be necessary every time you catch a bass, but you should always follow these steps if you’re planning on releasing a bass that’s been caught in water deeper than 20 feet.
By learning how to vent bass, you get to release more of your bass, which is better for the bass, better for the environment and helps make sure there are enough bass for you to get back on the water and fish again.
As an Amazon Associate I earn from qualifying purchases.